
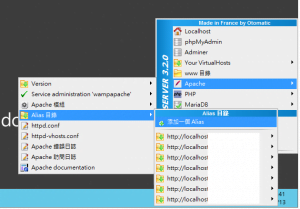
第一步 右下角工具列,滑鼠右鍵點選功能設定,添加一個Alias。

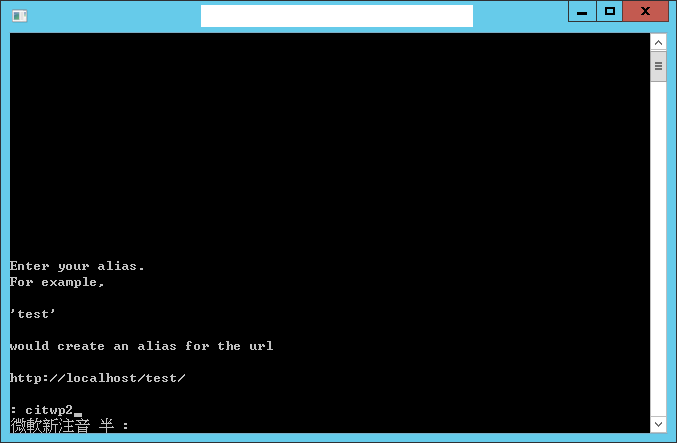
第二步 設定你要取的別名(alias),也就是網址上會呈現的名稱!!!
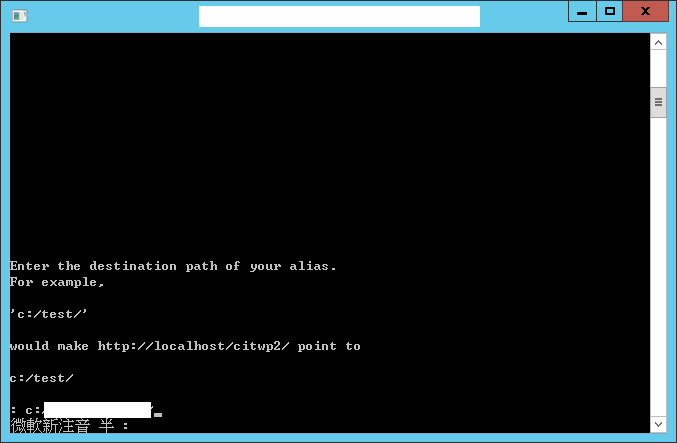
第三步 設定網站實際存在於電腦硬碟的位置。
ex:c:/www/web1/
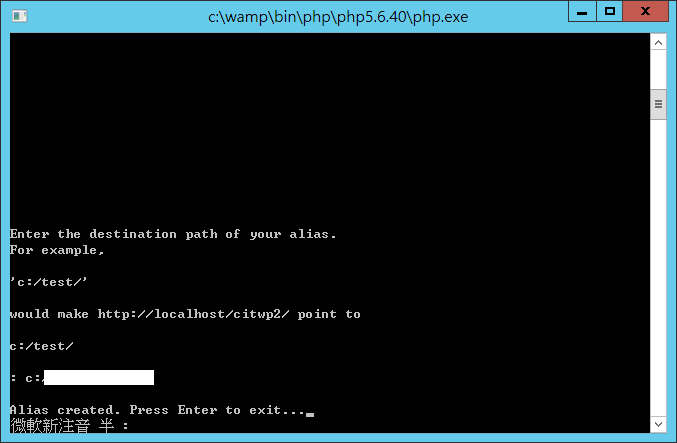
第四步 按下Enter退出即可,此時網頁伺服器會自動重新啟動。
第五步 Edit alias,修改alias設定
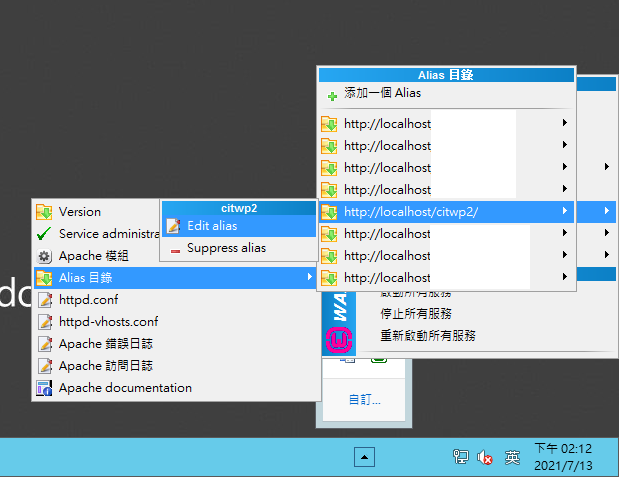
第六步 修改citwp2.conf設定檔
Alias /citwp2 "c:/www/test/"
<Directory "c:/www/test/">
Options Indexes FollowSymLinks MultiViews
AllowOverride all
<ifDefine APACHE24>
Require local
</ifDefine>
<ifDefine !APACHE24>
Order Deny,Allow
Deny from all
Allow from localhost ::1 127.0.0.1
</ifDefine>
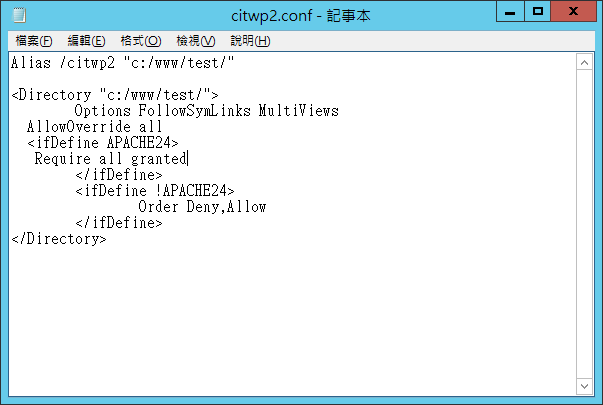
</Directory>第七步 將citwp2.conf設定檔更改如下,
Indexes 刪除
Require local 改為 Require all granted
Deny from all 刪除
Allow from localhost ::1 127.0.0.1 刪除
Alias /citwp2 "c:/www/test/"

<Directory "c:/www/test/">
	Options FollowSymLinks MultiViews
  AllowOverride all
  <ifDefine APACHE24>
   Require all granted
	</ifDefine>
	<ifDefine !APACHE24>
		Order Deny,Allow
	</ifDefine>
</Directory>
第八步 按下打X存檔離開即可,此時網頁伺服器會自動重新啟動。
期待您的留言
Comments